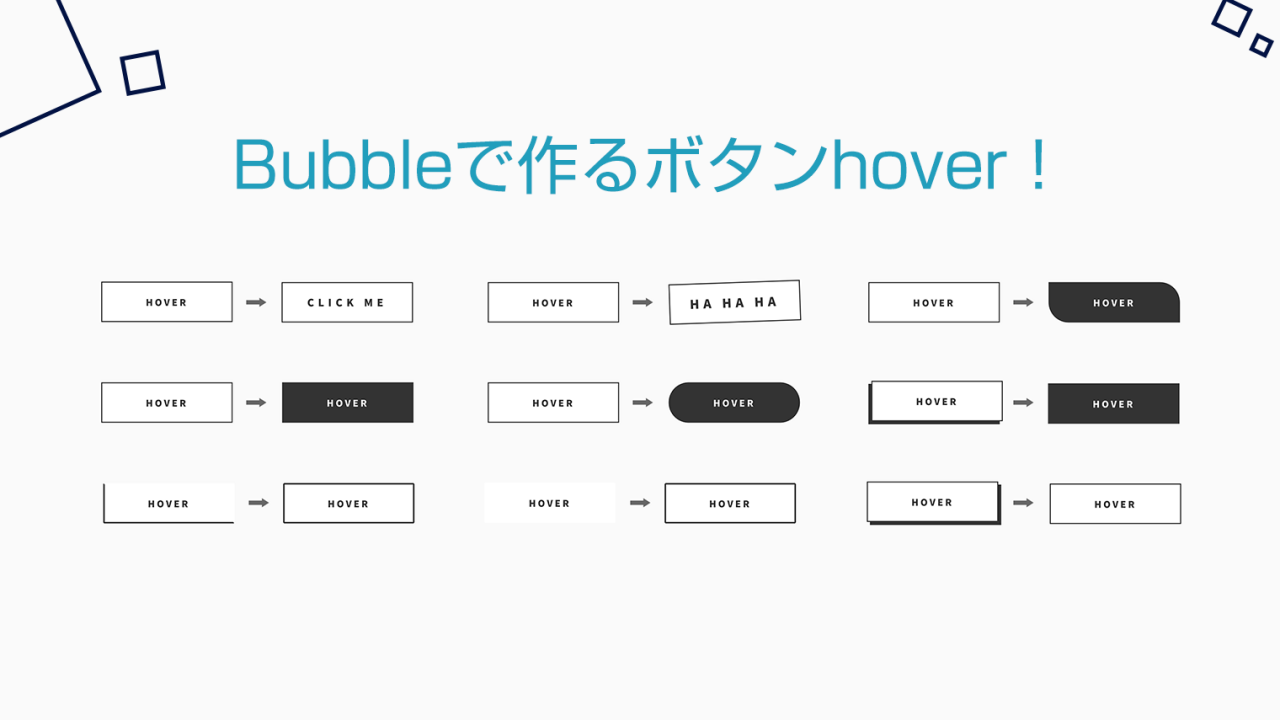
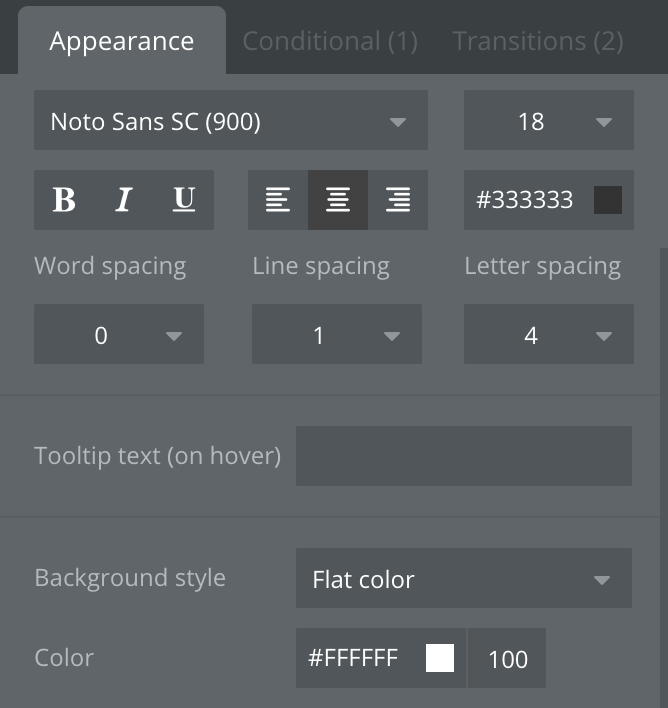
先日Twitterで、Bubbleのボタンについての投稿をしました!
反応が良かったので、構築に必要なデータを全公開します。
Bubblerのみなさん、是非お役立てください!
この記事はBubble旧エディタ時代に書かれています。
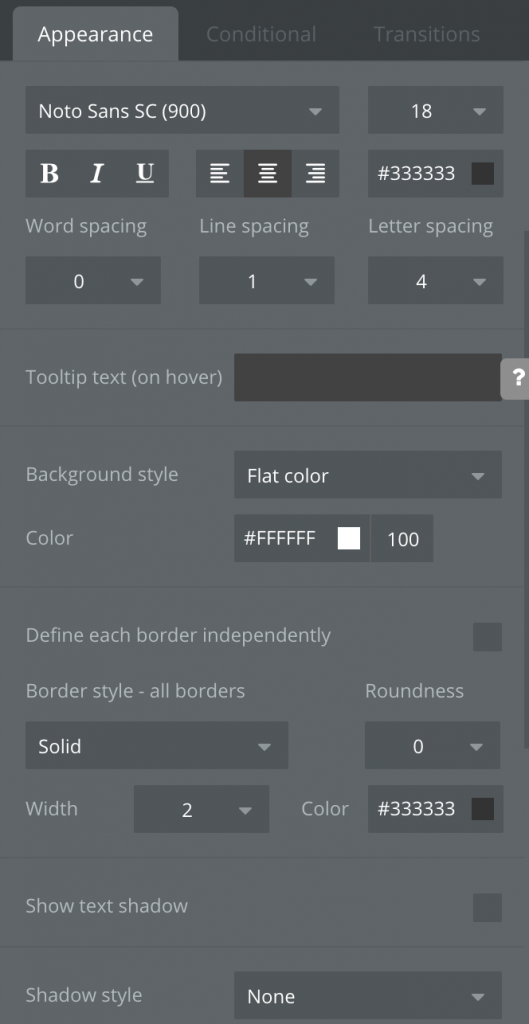
エディタの項目や配置に違いがあります。特にプロパティエディタの「Conditional」タブの位置が旧エディタでは真ん中に配置されていますのでご注意ください。
https://go-for-it.bubbleapps.io/version-test/button_challenge
ユーザー名:username
パスワード:password
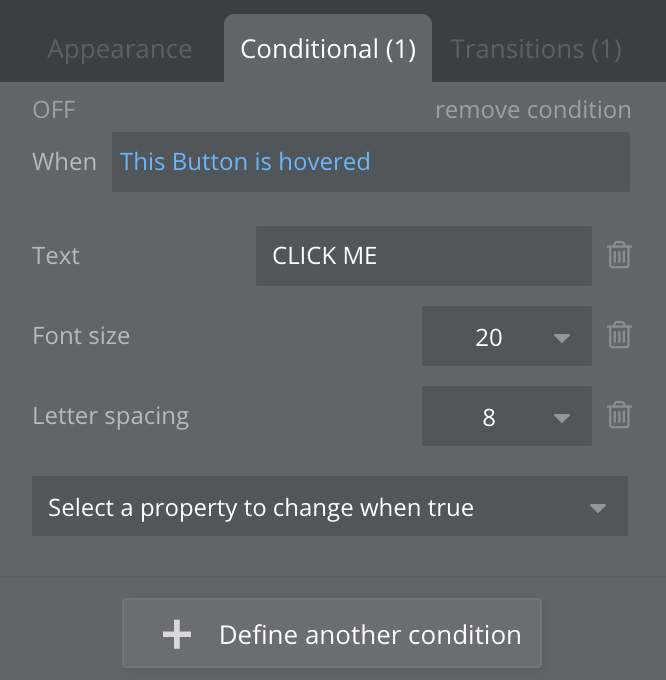
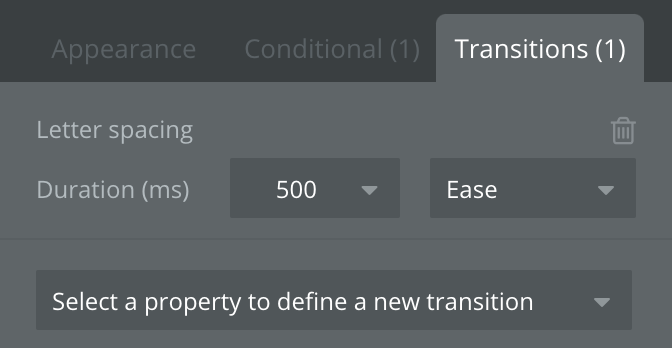
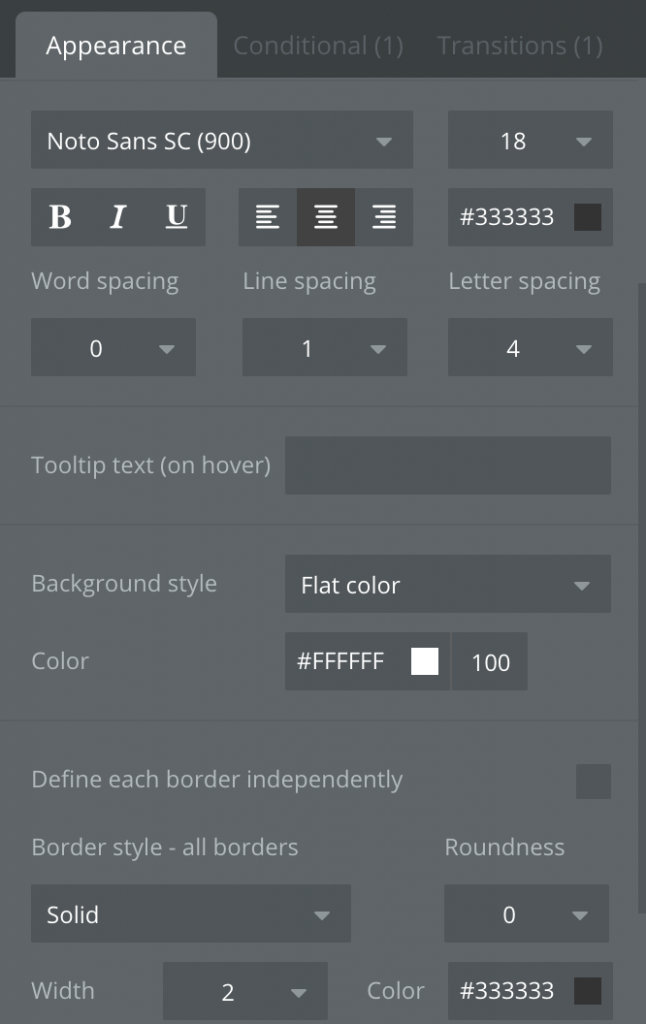
文字が広がったり、斜めになったり
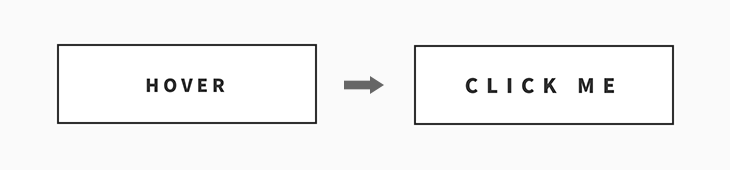
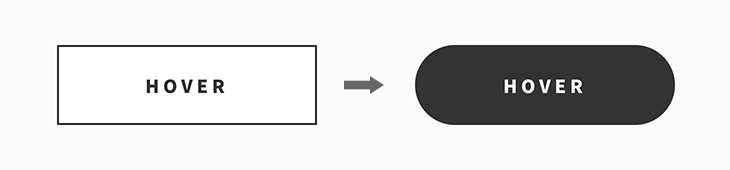
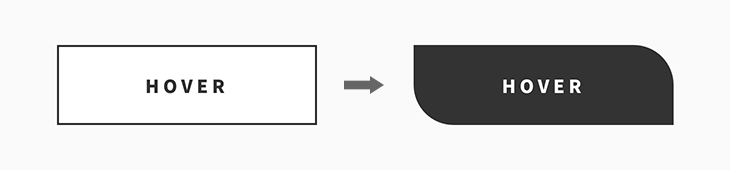
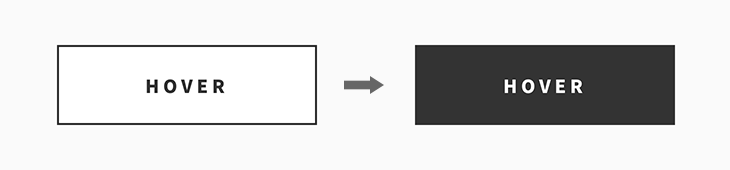
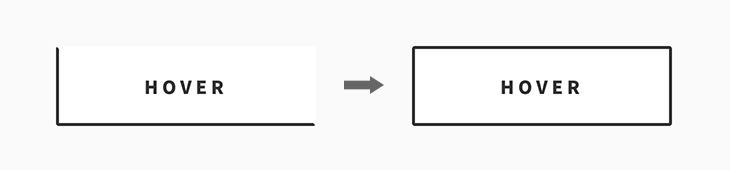
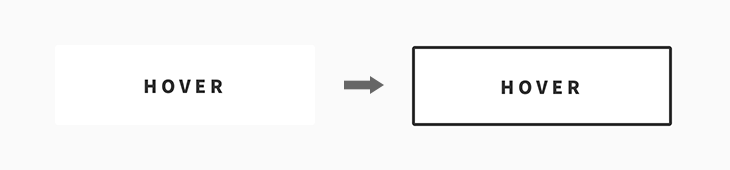
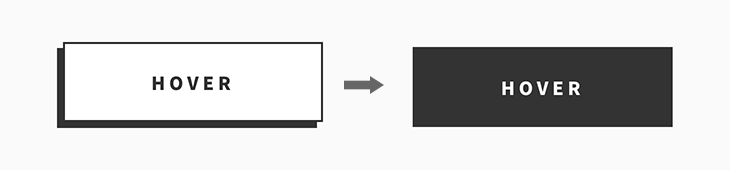
マウスオーバーをすると
・HOVERの文字がCLICK MEに変化
・文字サイズ若干拡大
・文字間のスペースも開く

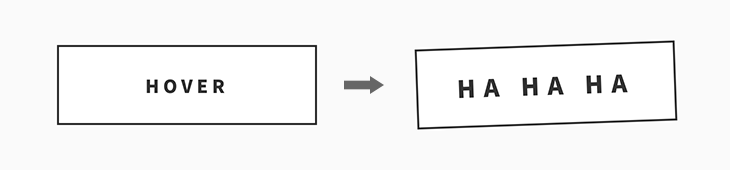
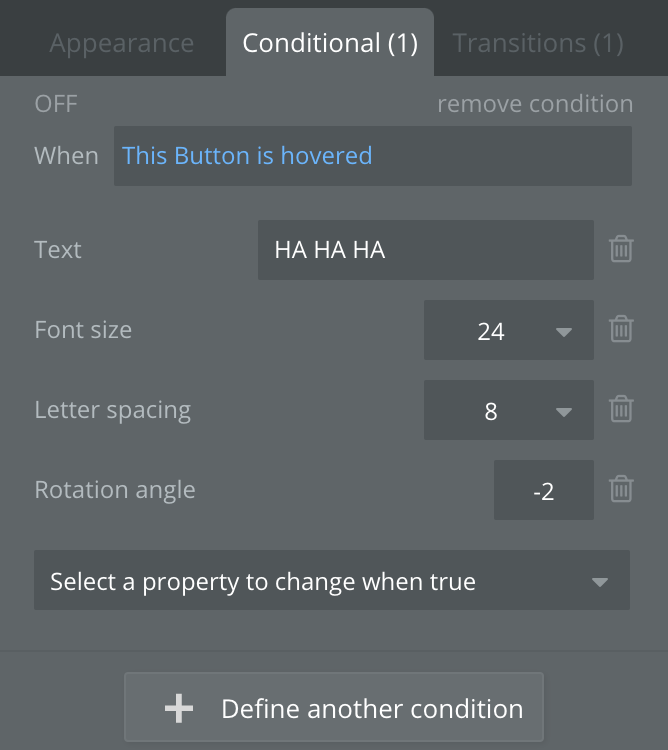
マウスオーバーをすると
・ボタンが斜めに
・HOVERの文字がHA HA HAに変化
・文字サイズ若干拡大
・文字間のスペースも開く
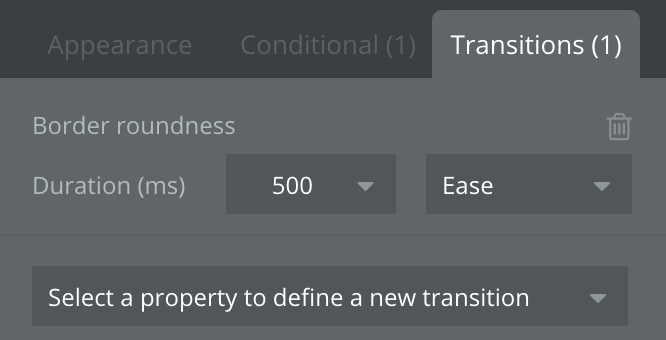
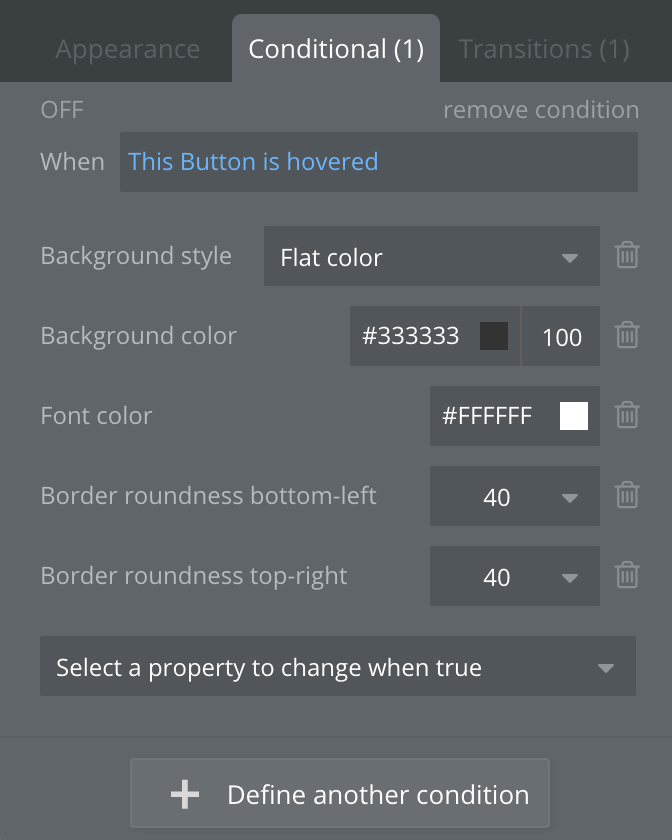
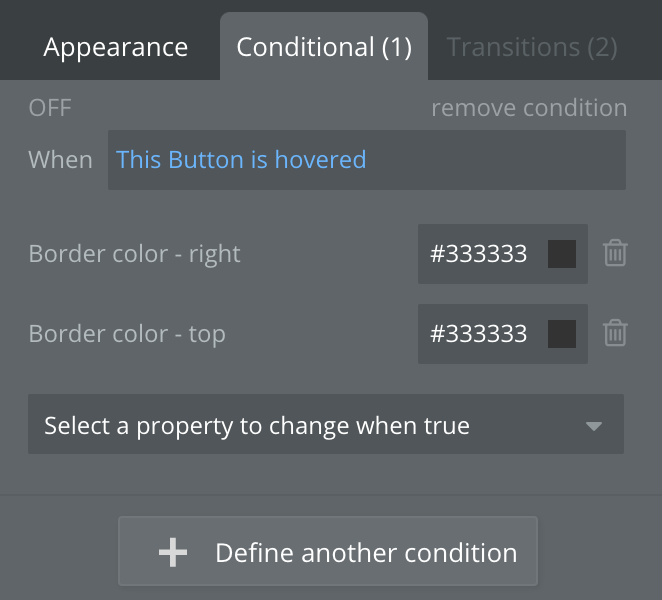
角丸
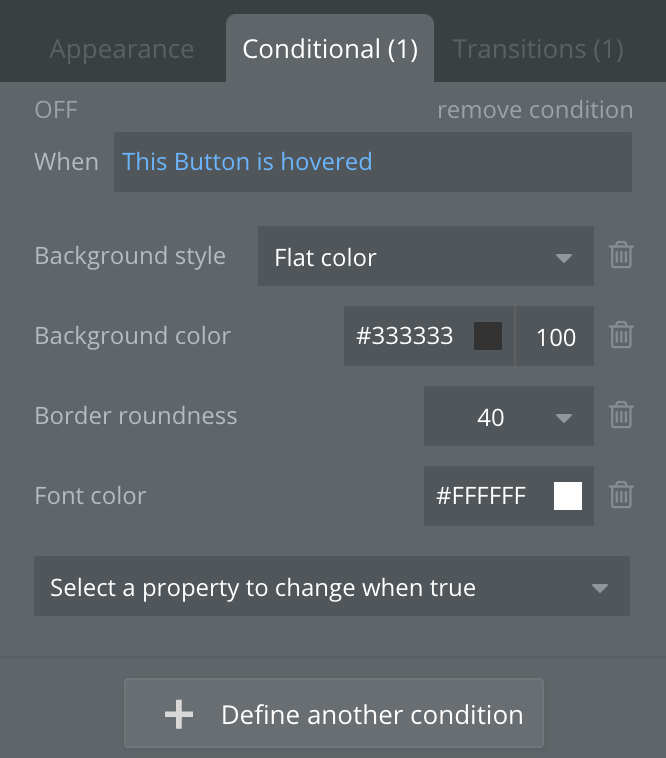
マウスオーバーをすると
・ボタンが角丸に
・背景と文字色逆転

マウスオーバーをすると
・右上と左下だけ角丸
・背景と文字色逆転
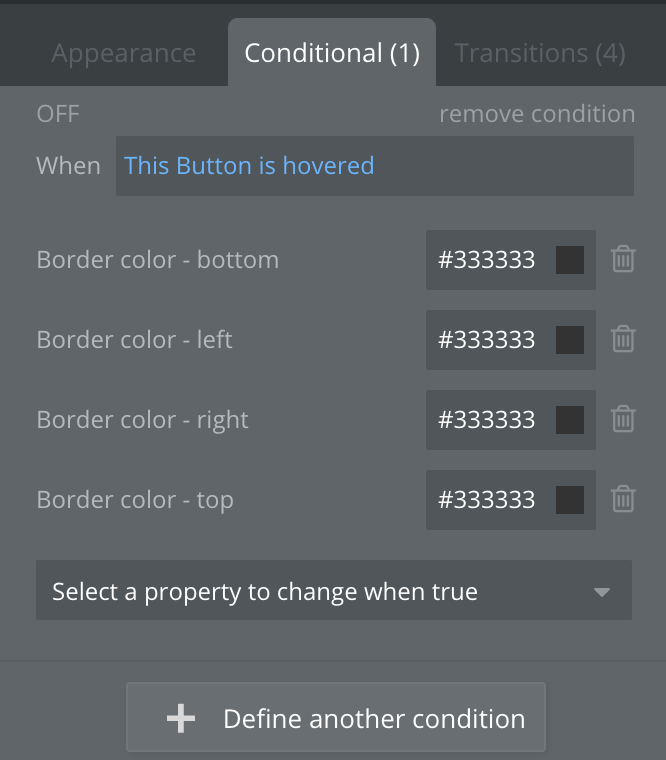
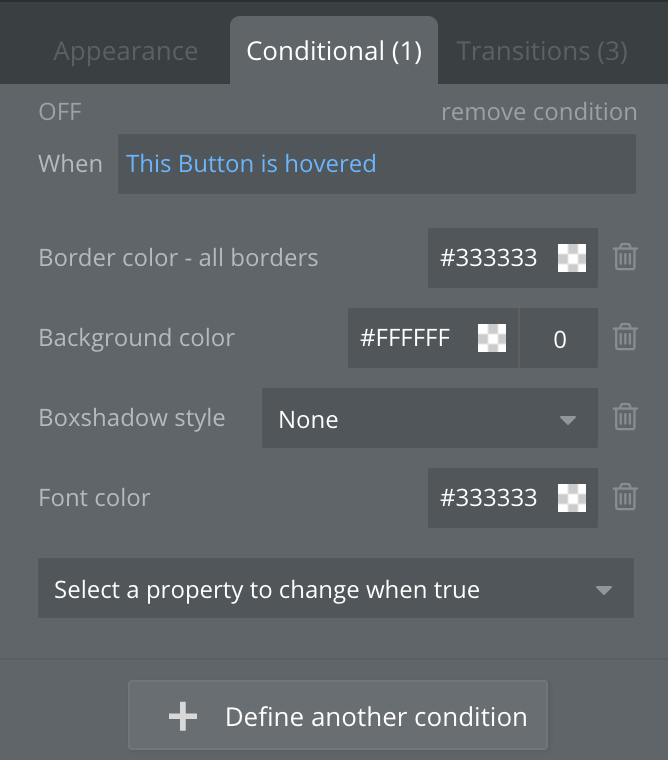
✔︎ポイント
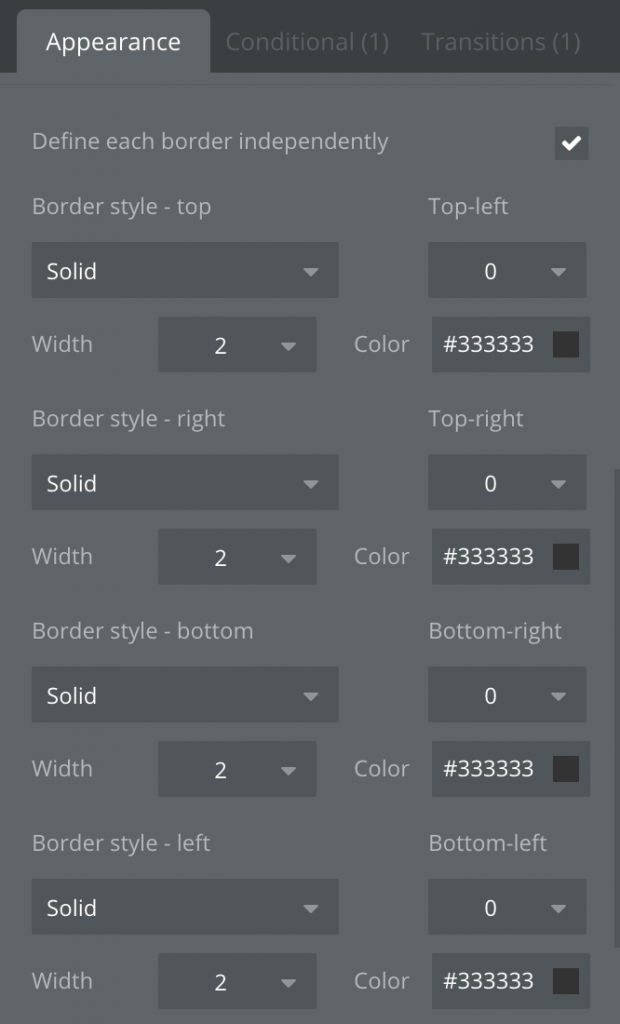
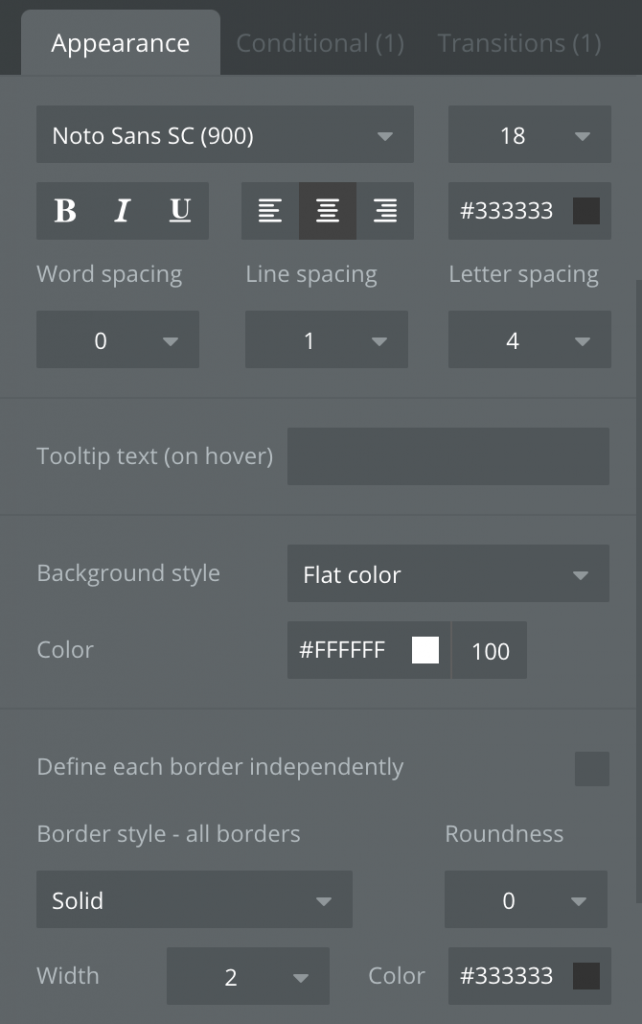
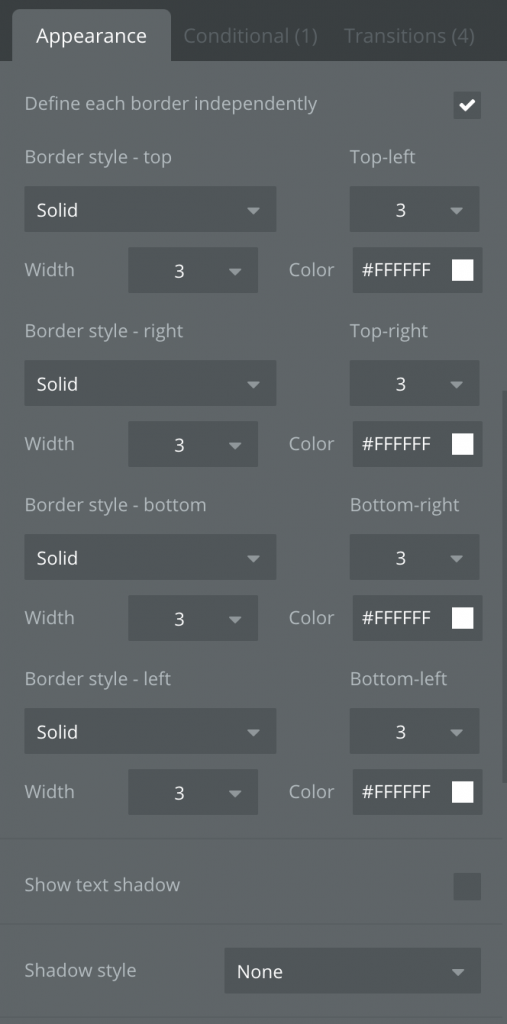
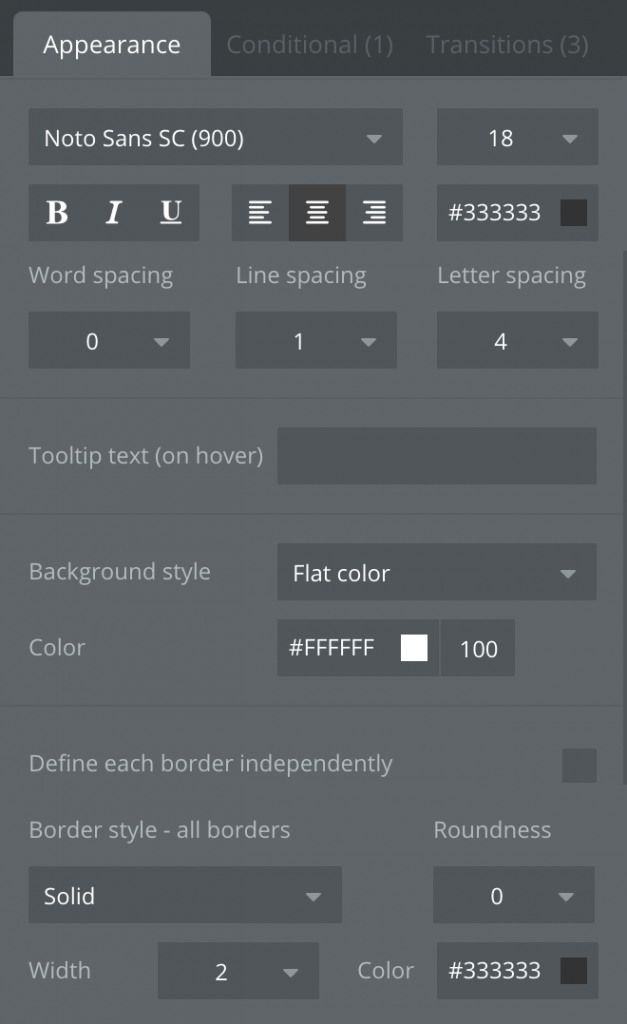
はじめにAppearanceで「Define each border independently」を設定しておくこと。
そうすることで、Conditionalで4箇所の角を別々に設定が可能になります!
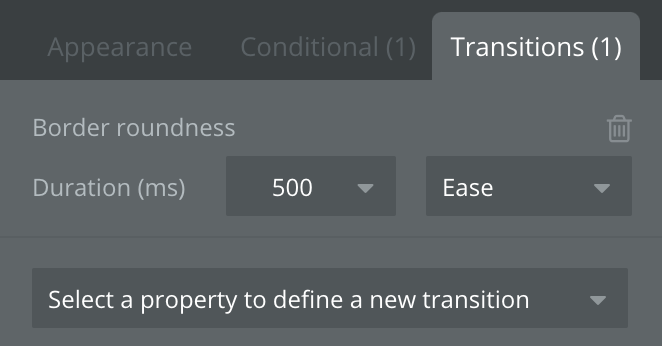
閉じたり、開いたり
マウスオーバーをすると
・左右上下から背景が黒くなる
・背景と文字色逆転
✔︎ポイント
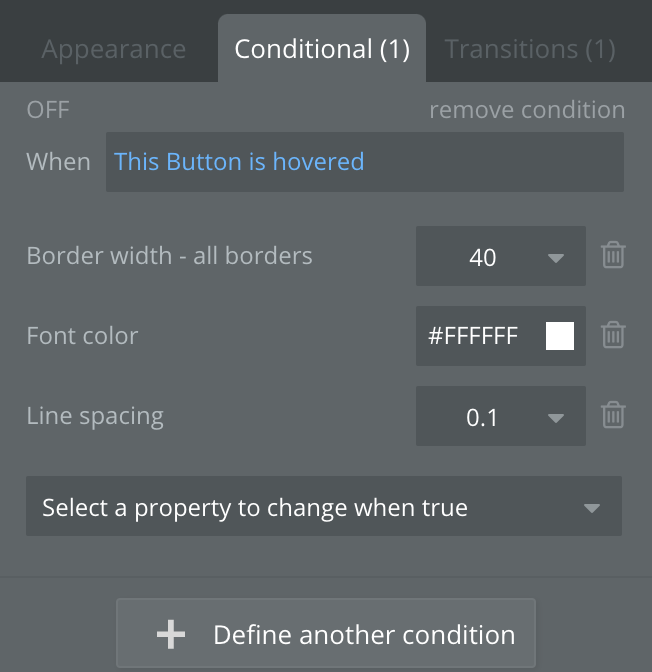
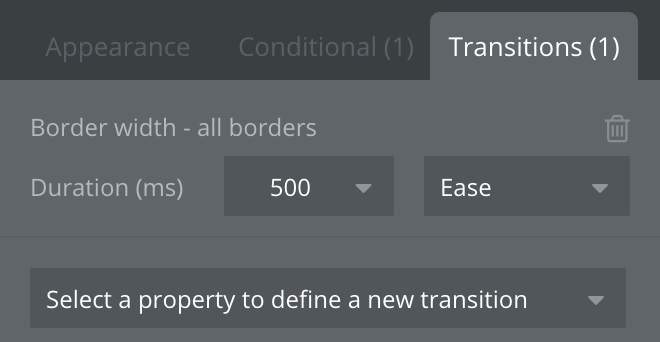
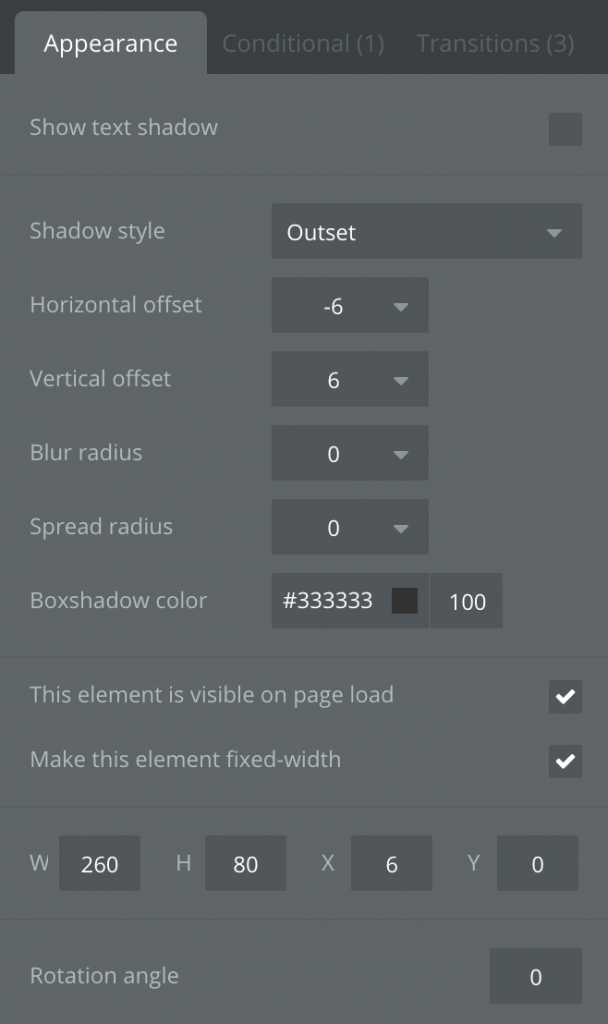
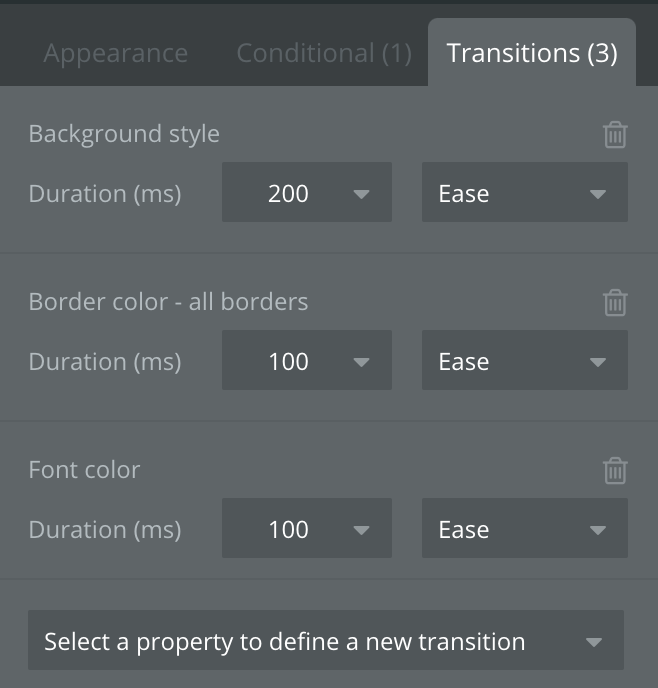
Border widthの幅を太くする、併せてTransitionsを入れることで徐々に背景が黒くなるように見せている。
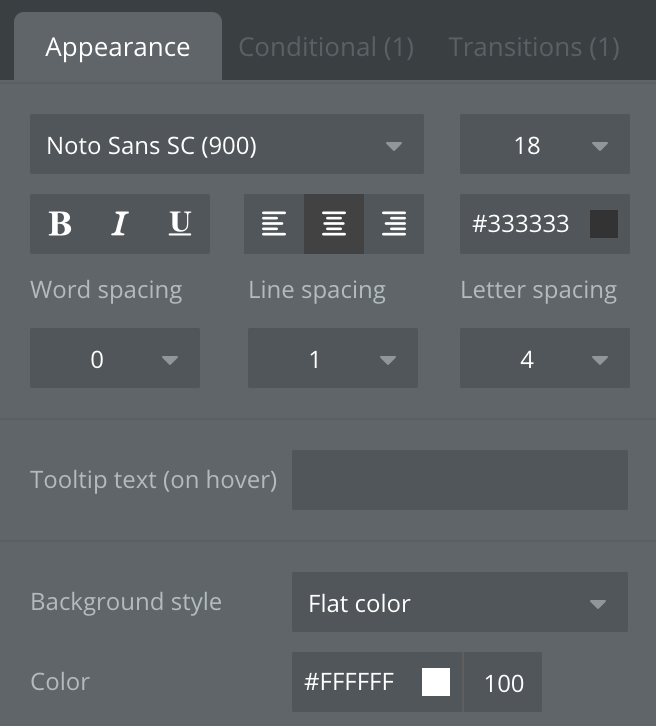
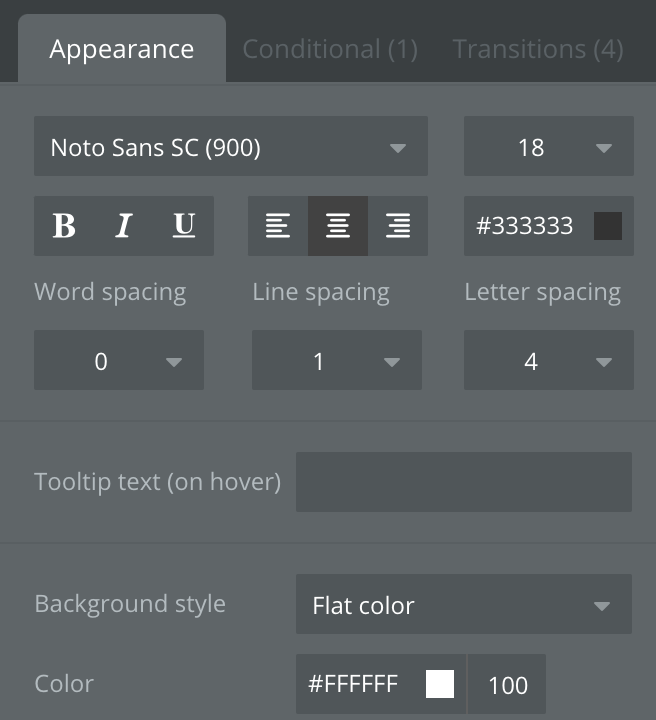
上のBorder widthが太くなり、文字もその分下がってしまうのを解消するため、Line spacingを初期「1」→「0.1」に変更。

マウスオーバーをすると
・中央から背景が白くなる
・背景と文字色逆転
✔︎ポイント
一つ前の上下左右から背景が黒くなるの逆
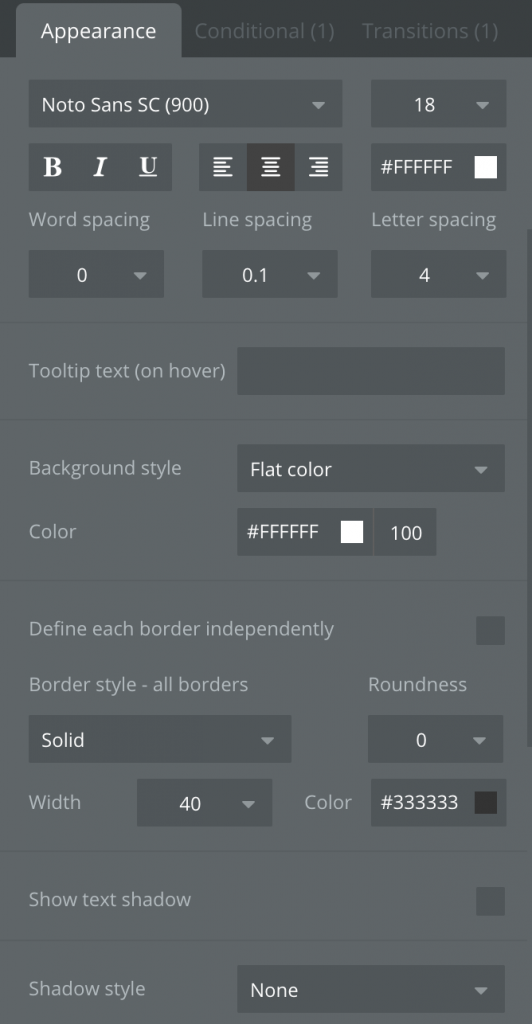
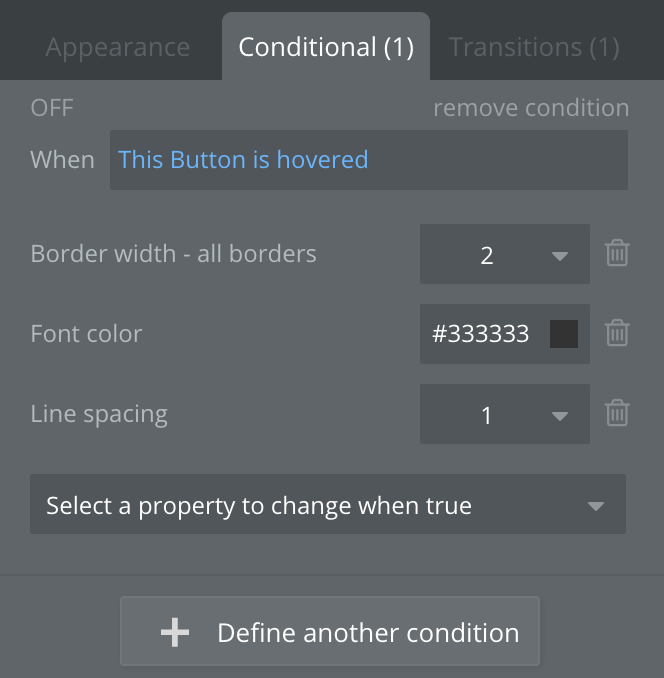
初期の背景は Border width40で作成し、マウスオーバーで 2に細くしている。
Border width(上からの)が太いため、文字位置が中央に来るように0.1に調整。
マウスオーバーでLine spacingを1に戻している。
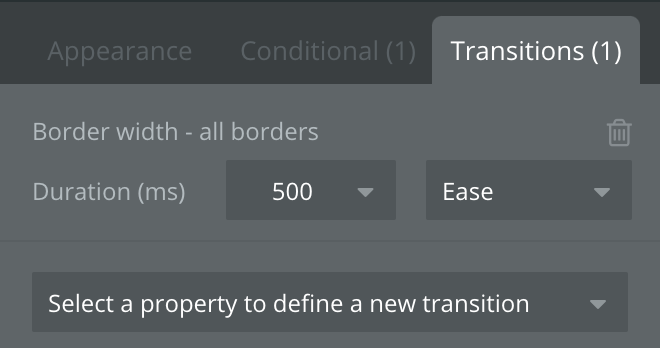
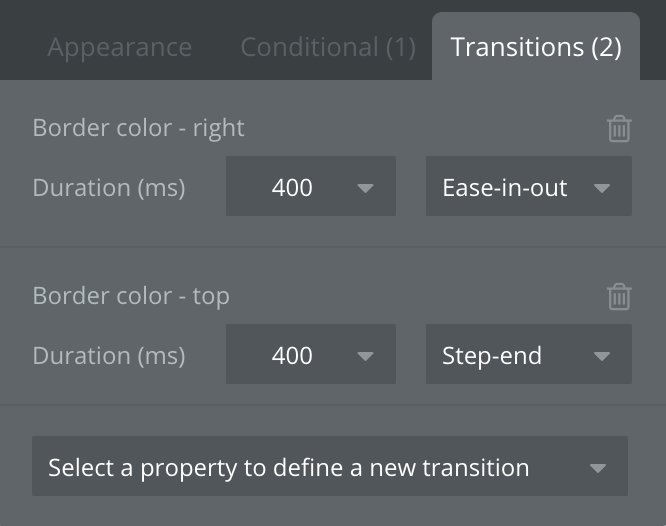
線が引かれる
マウスオーバーをすると
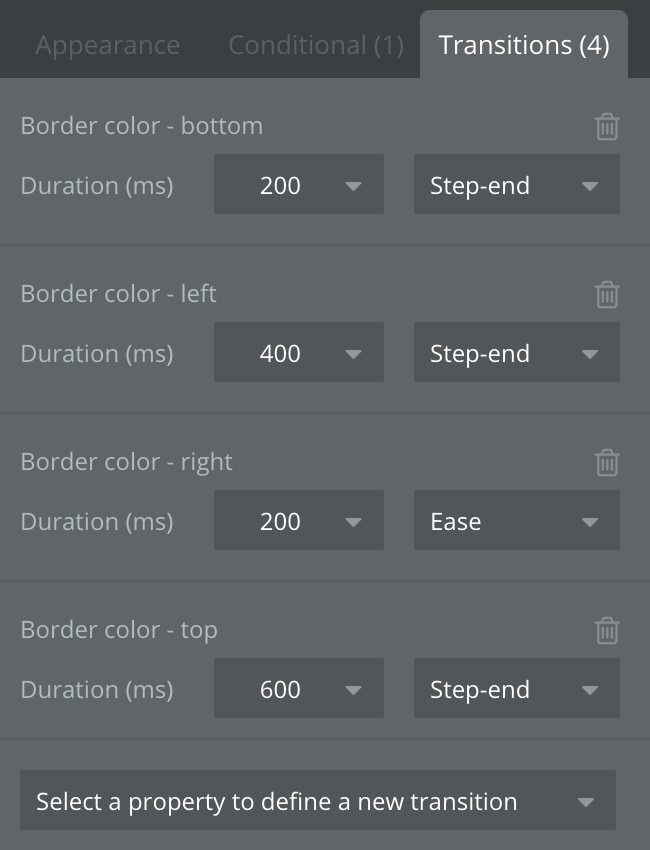
・右線→上線の順にボーダーラインが引かれる
✔︎ポイント
始めに左と上の線も背景と同じ色で引いておく(見た目には同色なので線が無いように設定)
Transitionsで時差をつけることにより、右線が先に、その次に上線が引かれたように見せている。Step-endで、その秒数分遅れて開始される。
マウスオーバーをすると
・右線→下線→左線→上線の順にボーダーラインが引かれる
✔︎ポイント
一つ前と原理は同じ。
始めに背景と同じ色で Border Colorを付けておく。
Define each border independentlyで設定をしておくことで、各線に指定が可能になる。
マウスオーバー時にTransitionsで時差で線に色をつけ、順番に線が引かれたように見せている。
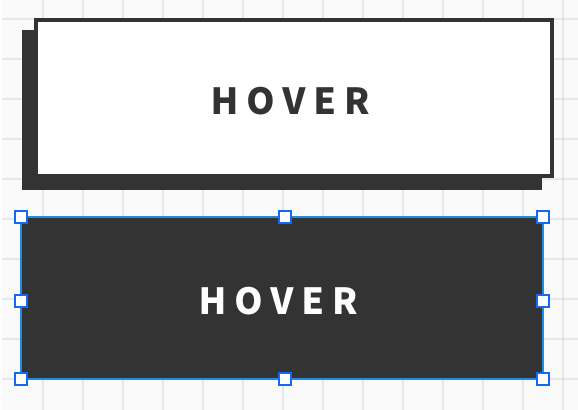
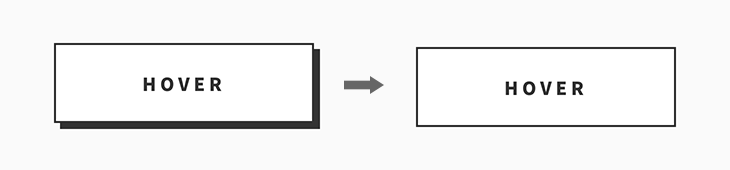
ボタンみたいでしょ
ボタンを押したように見せる挙動、実はトリッキーな設定をしています。
本当はShadow styleをつけて、そのボタンをマウスオーバーすると影なし&影分下にズラす設定をしたかったのですが、影無しにはできても、下にズラす動きはConditionalで項目が無くできませんでした。
そのためボタン2個を重ねています。
マウスオーバーをすると
・左下にボタンが押されたように見える
・ボタンが完全に押されると、ボタンの背景と文字色が逆転する
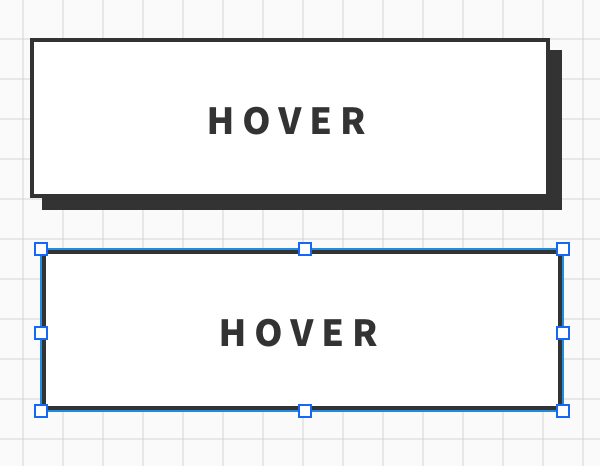
✔︎ポイント
マウスオーバーで上に被せているボタンの透明度をゼロにし、元々下に置いている
背景黒のボタンを見えるように設定している。
下の黒色ボタンは、上の白ボタンShadowに合わせた位置(左下)に配置。
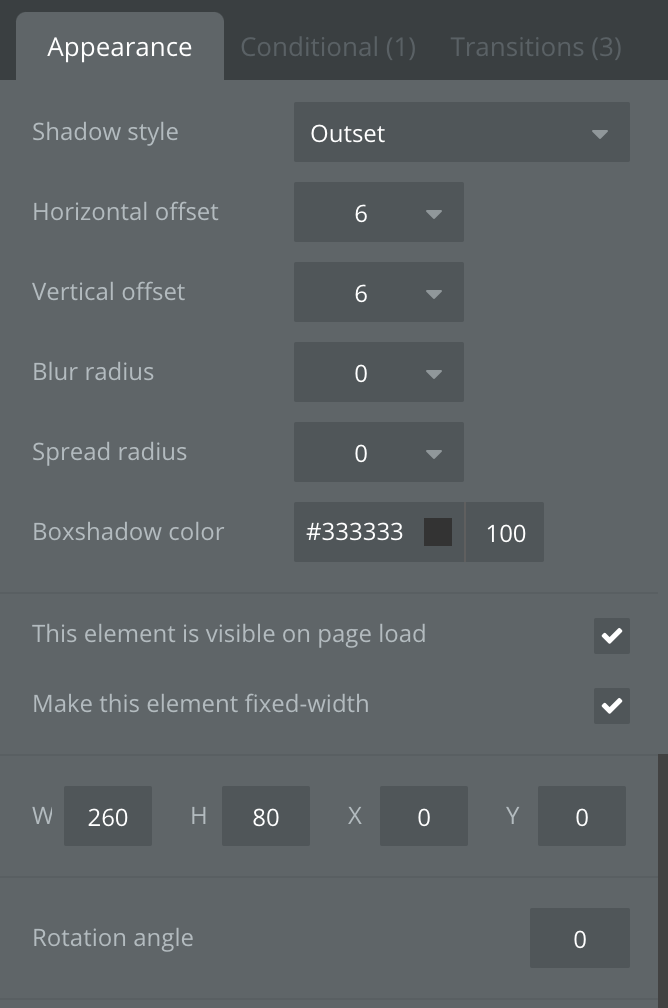
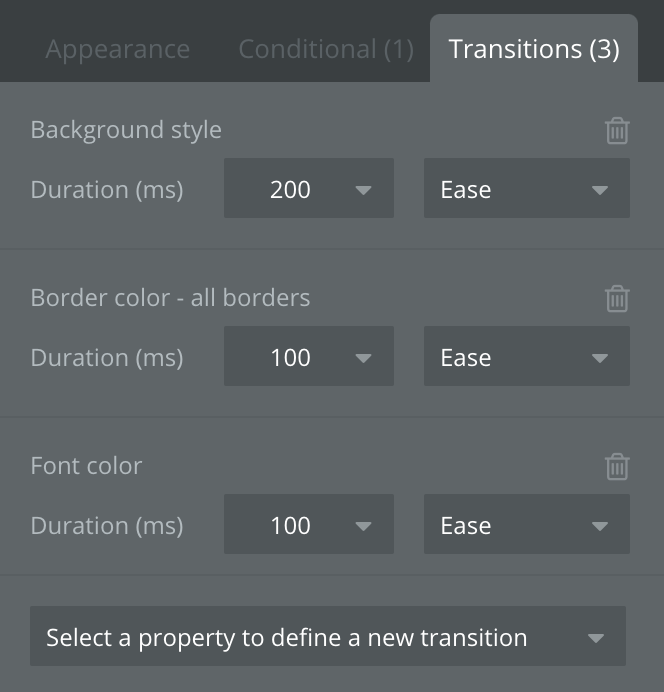
上に被せた白色ボタンの設定↓
下に置いた黒色ボタンの設定↓

上のボタンの原理を使い、今度は右下に押されるボタンを作りました。
今度はマウスオーバーでボタンの背景と文字色はそのままです。
2個のボタンを重ねています。
マウスオーバーをすると
・右下にボタンが押されたように見える
・ボタンが完全に押されても、ボタンの背景と文字色は同じ
✔︎ポイント
マウスオーバーで上に被せているボタンの透明度をゼロにし、元々下に置いている
ボタンを見えるように設定している。
下の白色ボタンは、上の白ボタンShadowに合わせた位置(右下)に配置。
上に被せた白色ボタンの設定↓


下に置いた黒色ボタンの設定↓
Bubbleで作るコード無しボタン、今後も研究します♪
いかがでしたでしょうか?
コード無しでここまでのボタンを作ることができるんです!
Bubbleはアイディア次第で可能になることがたくさんあります。
ひらめき!と相性抜群なツールです。
自由な発想ができるように、常に頭をやわらかく〜する必要性も感じました。
知れば知るほど楽しくなるBubble♪
今日も一歩前進!引き続き楽しんでいきましょう^^